Mastering the art of reading a tape measure is an essential skill that can greatly enhance your DIY projects, home renovations, or professional carpentry tasks.
Whether you’re hanging a picture frame, building furniture, or planning a renovation, knowing how to read a measuring tape accurately can save you time, money, and frustration.
This comprehensive guide is tailored for beginners and will walk you through the ins and outs of tape measures, ensuring that you can read measurements with confidence.
Understanding The Tape Measure
A tape measure is a flexible tool specifically designed for measuring length or distance. Typically, it consists of a long, flexible ribbon marked with various measurements. They are constructed from several materials, including cloth, plastic, fiberglass, and metal. Understanding the construction and purpose of a tape measure is crucial for effective use.
Key Components of a Tape Measure
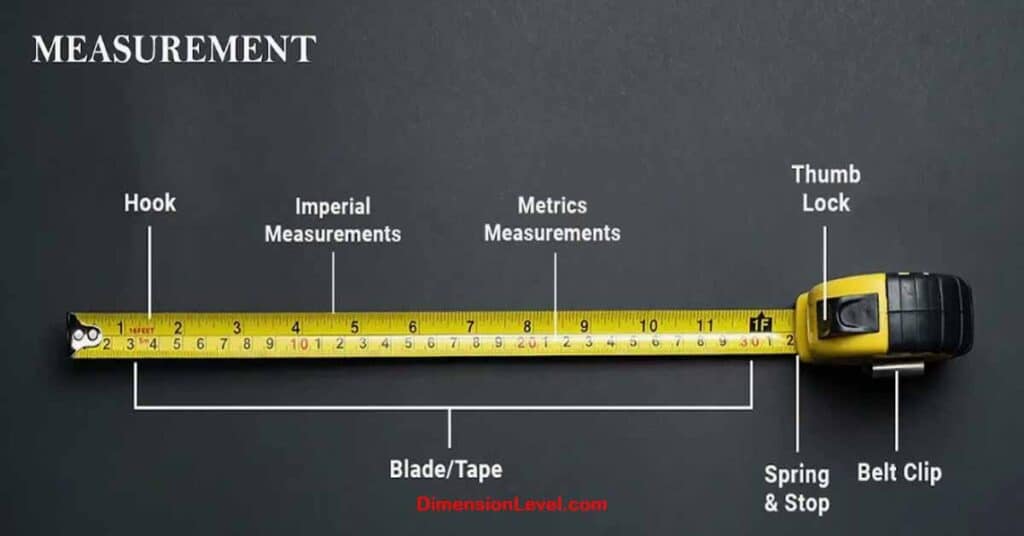
To use a tape measure effectively, you must familiarize yourself with its key components. Each part serves a specific purpose that contributes to accurate measurement. Here’s a closer look at these components:
- Blade: The blade is the primary measuring portion of the tape measure. It is usually marked with linear-measurement markings, either in the imperial or metric system. The blade is often made from materials that provide durability and flexibility, allowing it to be coiled or uncoiled as needed.
- Case: The case is the outer covering that protects the blade from wear and tear. It is designed for ease of handling and is usually made from sturdy plastic or metal. The case is also what allows you to store the tape measure compactly when not in use.
- Lock: The lock mechanism is a crucial feature that allows you to secure the blade at a specific length. By locking the tape in place, you can take measurements without worrying about the tape retracting unexpectedly. This is especially useful for longer measurements where precision is key.
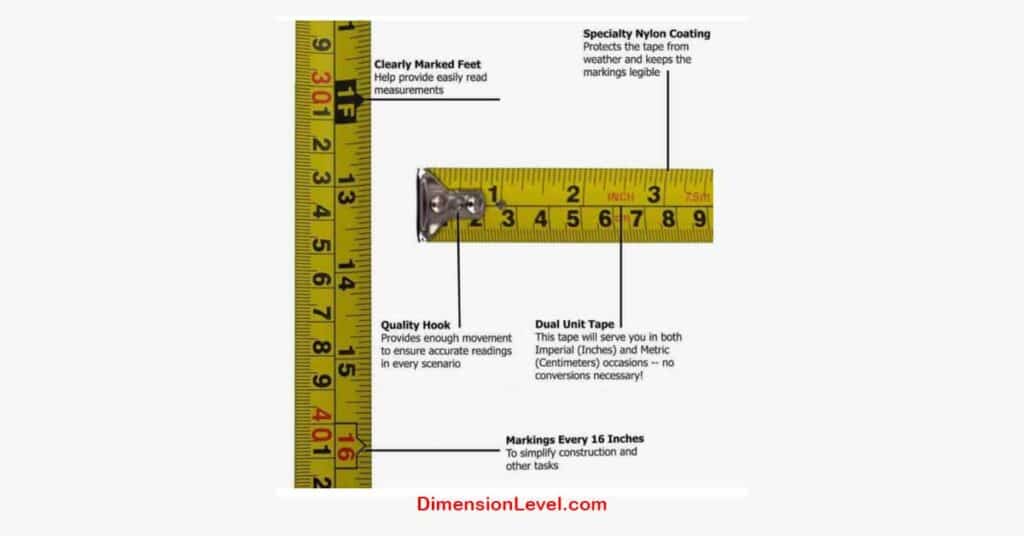
- Hook: The hook, often made from metal, is located at the end of the blade. It serves to catch onto the object you’re measuring, ensuring that your measurement starts from the correct point. The hook is designed to slide slightly, which compensates for its thickness when measuring.
- Spring Mechanism: The spring mechanism is what allows the tape to retract automatically when the lock is released. This feature makes it easy to store the tape measure and ensures that the blade does not become damaged when not in use.
You Might Also Like How to Measure a Room for a Ceiling Fan (Step-by-step Guide)
Understanding Tape Measure Markings
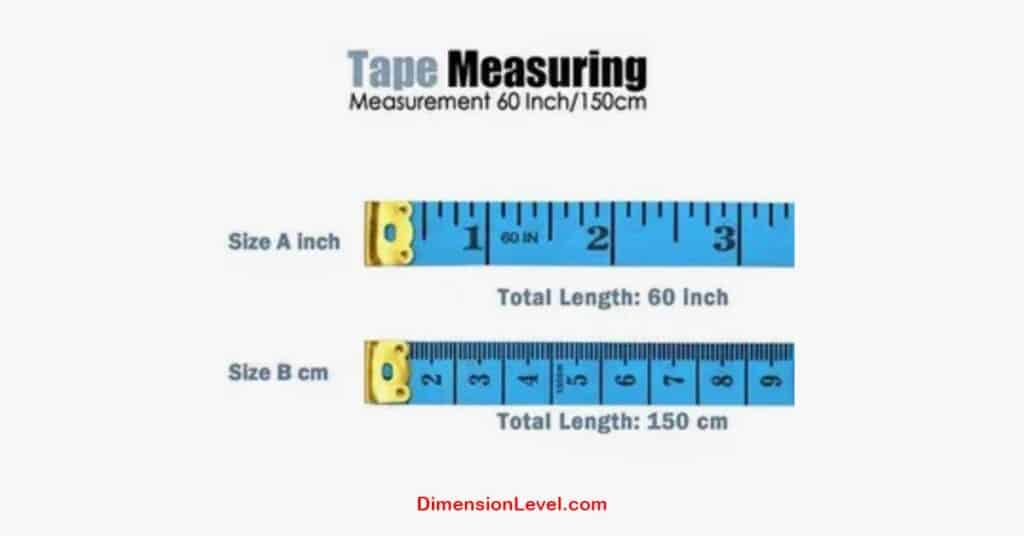
A significant part of reading a tape measure involves understanding the markings that indicate measurements. Tape measures typically use two primary measurement systems: the imperial system and the metric system.
- Imperial System:
- Inches: In the imperial system, inches are the primary unit of measurement. The tape measure features larger marks that represent whole inches, along with smaller marks indicating fractional inches, such as 1/2, 1/4, 1/8, and 1/16.
- Feet: Every 12 inches is represented by a longer marking, usually highlighted to differentiate it from smaller increments. This helps users quickly identify larger measurements when needed.
- Metric System:
- Centimeters: The metric system is often preferred in many parts of the world and uses centimeters as a primary unit of measurement. The large numbers on the tape indicate centimeters, with markings typically spaced evenly apart.
- Millimeters: Within each centimeter, smaller lines represent millimeters. This level of granularity allows for more precise measurements, which is especially important in certain fields such as engineering and design.
Summary of Markings on a Tape Measure
| Measurement System | Unit | Markings |
| Imperial | Inches | Whole inches, 1/2, 1/4, 1/8, 1/16 |
| Feet | Every 12 inches | |
| Metric | Centimeters | Large numbers (cm), marked every 10 mm |
| Millimeters | Smaller markings within each cm |
Types of Measurements on a Tape Measure
Understanding the types of measurements you can read on a tape measure will greatly enhance your ability to use it effectively.
Reading Imperial Measurements
When using a tape measure marked in imperial units, it’s important to familiarize yourself with both whole numbers and fractions. Here’s how to read imperial measurements accurately:
- Identifying Whole Inches: Locate the largest markings on the tape; these indicate whole inches. Each whole inch is separated by a longer line. The number next to this line tells you the measurement in inches.
- Understanding Fractions: Smaller lines represent fractions of an inch. Here’s a breakdown of common fractional markings:
- 1/2 inch: This is marked by a longer line that divides the inch in half.
- 1/4 inch: A shorter mark halfway between the 0 and the 1/2-inch mark.
- 1/8 inch: Even smaller marks that show eighths of an inch.
- 1/16 inch: The smallest divisions, useful for fine measurements.
To illustrate this better, here is how fractions look visually on a tape measure:
| Fraction | Marking Location |
| 1/2 inch | Long line between whole inches |
| 1/4 inch | Short line halfway to 1/2 |
| 3/4 inch | Short line halfway to 1 |
| 1/8 inch | Short line between 1/4 marks |
| 1/16 inch | Smallest divisions |
Reading Metric Measurements
For those using the metric system, reading a measuring tape involves understanding centimeters and millimeters:
- Centimeters: The larger numbers on the tape represent centimeters. Each centimeter is typically marked with a longer line and spaced evenly apart. This is ideal for measuring larger objects or distances.
- Millimeters: Smaller divisions indicate millimeters. Each centimeter is subdivided into ten millimeters, allowing for greater precision in measurements. This is particularly useful in situations where small measurements are necessary, such as in woodworking or crafting.
You might be Interested 10 Things That Have an Area of 70 Square Meters
Tips for Reading Measurements
To ensure that you read measurements accurately, consider these helpful tips:
- Align Your Eye Level: Always ensure that your eyes are level with the tape when taking measurements. This minimizes errors caused by viewing angles that can distort your perception of the markings.
- Use a Level Surface: When possible, measure on a flat surface to prevent distortion or slack in the tape. This ensures that the tape remains straight and taut during measurement.
- Practice with Real Objects: Using various objects to practice measuring will solidify your understanding. Try measuring common items around your home, such as furniture, windows, or appliances.
How to Read a Tape Measure? Step-by-Step Guide
Learning to read a tape measure can seem intimidating, but with a step-by-step approach, it becomes manageable.
Explore this A Simple Guide to Understanding the Metric And Imperial Systems
How to Read Large Numbers
Reading large numbers on a tape measure is straightforward once you know where to look. Follow these steps to read large numbers effectively:
- Locate the Large Number: Identify the last large number before your desired measurement. This will provide the base measurement in inches or centimeters.
- Estimate Distance from the Last Large Number: Use the smaller marks to gauge how far you are from that large number. For example, if the last large number is 5 inches and the smaller mark indicates you are at 5 and 1/4 inches, you can confidently report the measurement as 5 1/4 inches.
Understanding Smaller Markings
To accurately read a tape measure, you must understand the smaller markings. Here’s how to interpret them effectively:
- Fractions of an Inch:
- When reading fractions, note that the smaller lines indicate different fractions. If you’re between the 2-inch mark and the 3-inch mark, count how many small divisions you are past the last whole inch:
- 1 small mark = 2 1/16 inches
- 2 small marks = 2 1/8 inches
- 3 small marks = 2 3/16 inches
- 4 small marks = 2 1/4 inches
- When reading fractions, note that the smaller lines indicate different fractions. If you’re between the 2-inch mark and the 3-inch mark, count how many small divisions you are past the last whole inch:
- Millimeters:
- Similarly, millimeter markings are represented by very small divisions. Each centimeter is subdivided into ten equal parts, so when you read a millimeter measurement, make sure to count the smaller divisions accurately.
Tips for Accurately Aligning the Tape Measure
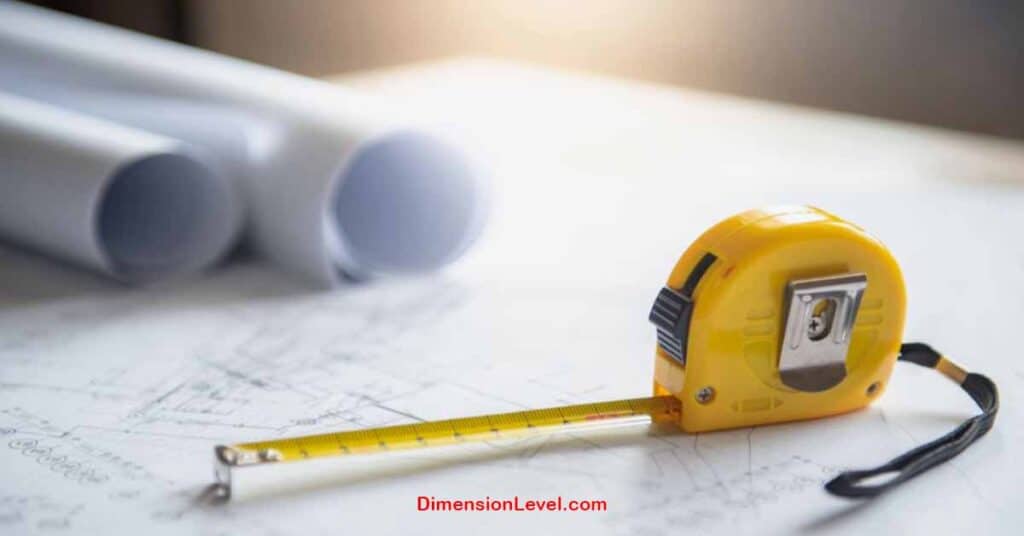
Achieving accuracy requires proper alignment and technique. Here are some valuable tips:
- Secure Placement: Ensure the hook is stable against the object you’re measuring. This stability is crucial for ensuring that your measurement starts from the correct point.
- Marking Measurements: Use a pencil or chalk for temporary markings. This practice allows you to transfer measurements easily without losing precision.
- Double-checking Measurements: It’s always a good idea to take multiple measurements for confirmation. If you are unsure about your first reading, measure again to ensure consistency.
Read More About How far is 5 km? 9 common comparisons
Common Mistakes to Avoid
While measuring, beginners often make simple mistakes that can lead to inaccurate results. Here are common pitfalls to watch out for:
Misreading Between the Marks
One of the most frequent errors is confusing smaller increments. Always take your time to ensure you accurately read the markings. If you rush, you might mistake a 1/4 mark for a 1/2 mark, leading to significant discrepancies.
Not Accounting for the Tape Case or Slack
The hook on the end of the tape can add or subtract length depending on how it’s used. Always account for the hook’s thickness to ensure precise measurements. If you allow the tape to sag or are careless with your hook placement, you might miscalculate your
measurements.
Errors in Reading the Imperial Versus Metric Scales
Switching between imperial and metric systems without proper attention can lead to significant errors. Ensure you are aware of which system you are using and avoid mixing measurements. It can be helpful to have a conversion chart nearby for reference.
Practical Applications
Understanding how to read a tape measure opens up a world of practical applications. Here are a few key areas where this skill is essential:
- DIY Home Improvements: From hanging shelves to constructing cabinets, accurate measurements can make the difference between a successful project and a costly error. Proper measurement helps ensure materials fit correctly and minimize waste.
- Professional Carpentry and Construction: For carpenters and builders, reading a tape measure is a daily task. Precision in measurements can significantly impact the quality and safety of construction work.
- Interior Design Projects: Accurate measurements help determine the best layout for a room, ensuring that furniture fits well and complements the space. This skill is crucial for creating aesthetically pleasing environments.
- Real Estate Assessments: Accurate measurements are crucial in real estate to assess property dimensions, ensuring listings are accurate and valuable. This skill can enhance your understanding of property sizes and layouts.
Conclusion: The Importance of Precision
Accurate measurements are foundational for successful projects, whether you’re a beginner or a seasoned professional. Here’s a recap of the key points discussed:
- Understanding the key components of a tape measure is crucial. Familiarizing yourself with the blade, case, lock, hook, and spring mechanism will enhance your measuring experience.
- Mastering reading techniques for both imperial and metric measurements enhances your skills. Knowing how to interpret both systems effectively allows for flexibility in projects.
- Awareness of common mistakes can save time and resources. By being mindful of potential pitfalls, you can avoid errors that could compromise your work.
The Value of Accurate Measurements
Accurate measurements can mean the difference between a successful project and a disaster. They help you save time, materials, and money while ensuring your projects meet your expectations. A single miscalculation can lead to significant issues, such as misfitting furniture or wasted materials.
Continuing to Improve
Regular practice and continued learning are essential for mastering the skill of reading a tape measure. Consider seeking additional resources, joining DIY workshops, or collaborating with experienced professionals to hone your skills.
By grasping these concepts and techniques, you’ll find that reading a measuring tape is not just easy—it’s a rewarding skill that elevates your ability to tackle various projects confidently. As you gain experience, you’ll find yourself reading measurements quickly and accurately, which will enhance your overall confidence in handling various tasks around the home or in professional settings. Embrace the learning process, and soon you’ll be measuring like a pro!
Key Takeaway
With the right knowledge and practice, reading a tape measure can become a straightforward task. Remember to approach each measurement with care and confidence, and enjoy the process of creating and building!
Read also How Long is 2 Miles? 10 Common Comparisons

Deborah Melindah is an experienced blogger passionate about exploring the world of dimensions. With a keen eye for detail and a talent for simplifying complex topics, she shares her knowledge on spatial concepts, measurements, and more. Deborah’s insightful posts make it easy for readers to grasp and apply dimensions in everyday life, whether for personal projects or professional pursuits.

